Intro
What often pops up is DireWolf, not the animal or the game!DireWolf is “Decoded Information from Radio Emissions for Windows Or Linux Fans”) and was developed by John Lagner, WB2OSZ. As the name implies it can run on PC's and even a Raspberry Pi.
Also i found DigiPi ( www.digipi.org https://craiger.org/ ), the KM6LYW Radio DigiPi Project
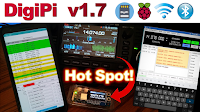
DigiPi is a hot-spot for all amateur radio data modes, including APRS, ax.25, winlink email, ft8, js8cal, slowscanTV, PSK31, packet and even CW. The implementation is an elegant, inexpensive, low-power, open-source Raspberry-Pi--based amateur radio data transceiver, managed exclusively by web browsers or smart-phone apps, with no bulky keyboards, monitors or complicated wiring. At the digipi.org website you can download an image for the raspberry pi with the options mentioned above already installed (including DireWolf and a web-interface.
 At this moment (november 2023) the DigiPi image is behind a paywall, and the password is available to patrons on the KM6LYW Patreon Page. Anything gets you access to the DigiPi image, even a dollar. According to KM6LYW the point is not to keep the software locked up, but to ultimately throttle the questions and support load. Plus it gives priority access to design decisions, code contributions and early releases. DigiPi is community driven and open source.
I made a small contribution and could download the image and put it on an sd card for my Raspberry using BalenaEtcher. (Also other sdcard writing tools can be used.)
I did not yet connect a ham radio and wanted to experiment with the software on my Raspberry and am interested in DireWolf and a sdcard with DigiPi seemed a nice way to start.
Also (as i am just starting up my HAM activities) i do not have one of the many transceivers on a list, that can be connected directly via USB to the DigiPi, however it also possible to interface over audio. For experimenting i recommend to plug in a USB audio device in the USB (perhaps in the beginning with nothing connected) as the software does sense if no interface is available and in that case it will not go to some options.
The installation
There is sufficient info available to make the system work, however i had some special wishes and also wanted to experiment.
I want the network connection running over the wired ether-net interface, not over Wifi. Also i like to run some other software (The Mosquitto MQTT server) and perhaps later interface this with DireWolf.
Therefore i connected an ether net cable to my LAN and booted the system.
The DHCP server of my home-network did give the IP to the ether-net connection of the system. (The IP address of the Wifi is managed by the DigiPi).
What i did and not every time will mention is that installed parts needs to be activated (by (re-)starting the service or a reboot of the Pi). So see this as a general guide not an exact list of commands that always will work for you!
Timeserver / nameserver problem
I noticed the date and time on my pi where not correct.
Over the wired network i could reach the system (using hostname "DigiPi" or the IP address)
I did try to configure ntp, however i did not find the configuration files.
I made the decision to install ntp using "sudo apt-get install ntp"
However i did not succeed as the nameserver was missing and sites on the internet could not be reached by name.
At the bottom of dnsmasq.conf is
#craiger hotspot stuff
#AutoHotspot Config
#stop DNSmasq from using resolv.conf
no-resolv
#Interface to use
interface=wlan0
bind-interfaces
dhcp-range=10.0.0.50,10.0.0.150,12h
I changed changed no-resolv to #no-resolve and after this domainnames on internet could be resolved.
Now i could install ntp using "sudo apt-get install ntp" however i did not investigate the system sufficient !! :
During ntp install i noticed removal of "chrony" and that is (a better) alternative for ntp.
I expect the time was not updated as the timeserver on internet could not be reached by chrony. So better not install ntp !
At this point i could go back and create a fresh sdcard and i am sure i will need to do that some time however
"sudo apt-get install chrony"
gave me back chrony and i noticed the date and time where now correct.
Some links:
- http://www.digipi.org
- https://craiger.org/digipi
- http://discord.gg/3X9bMjjwxw (DigiPi live chat)
- http://groups.google.com/u/2/g/digipi (Primary group/mailing list)
- http://groups.io/g/digipi/ (old/depricated list, with some good info)
to be continued


No comments:
Post a Comment