Tuesday, October 6, 2020

Metal detector -2-

 After building the metal detector kit from the first blog post i received another DIY kit from Aliexpress for a metal detector. From this version i ordered (and received) two. Until now i only assembled one) . I did not (yet) find the circuit used in this version however as it contains other parts as than the first kit the circuit must be different.

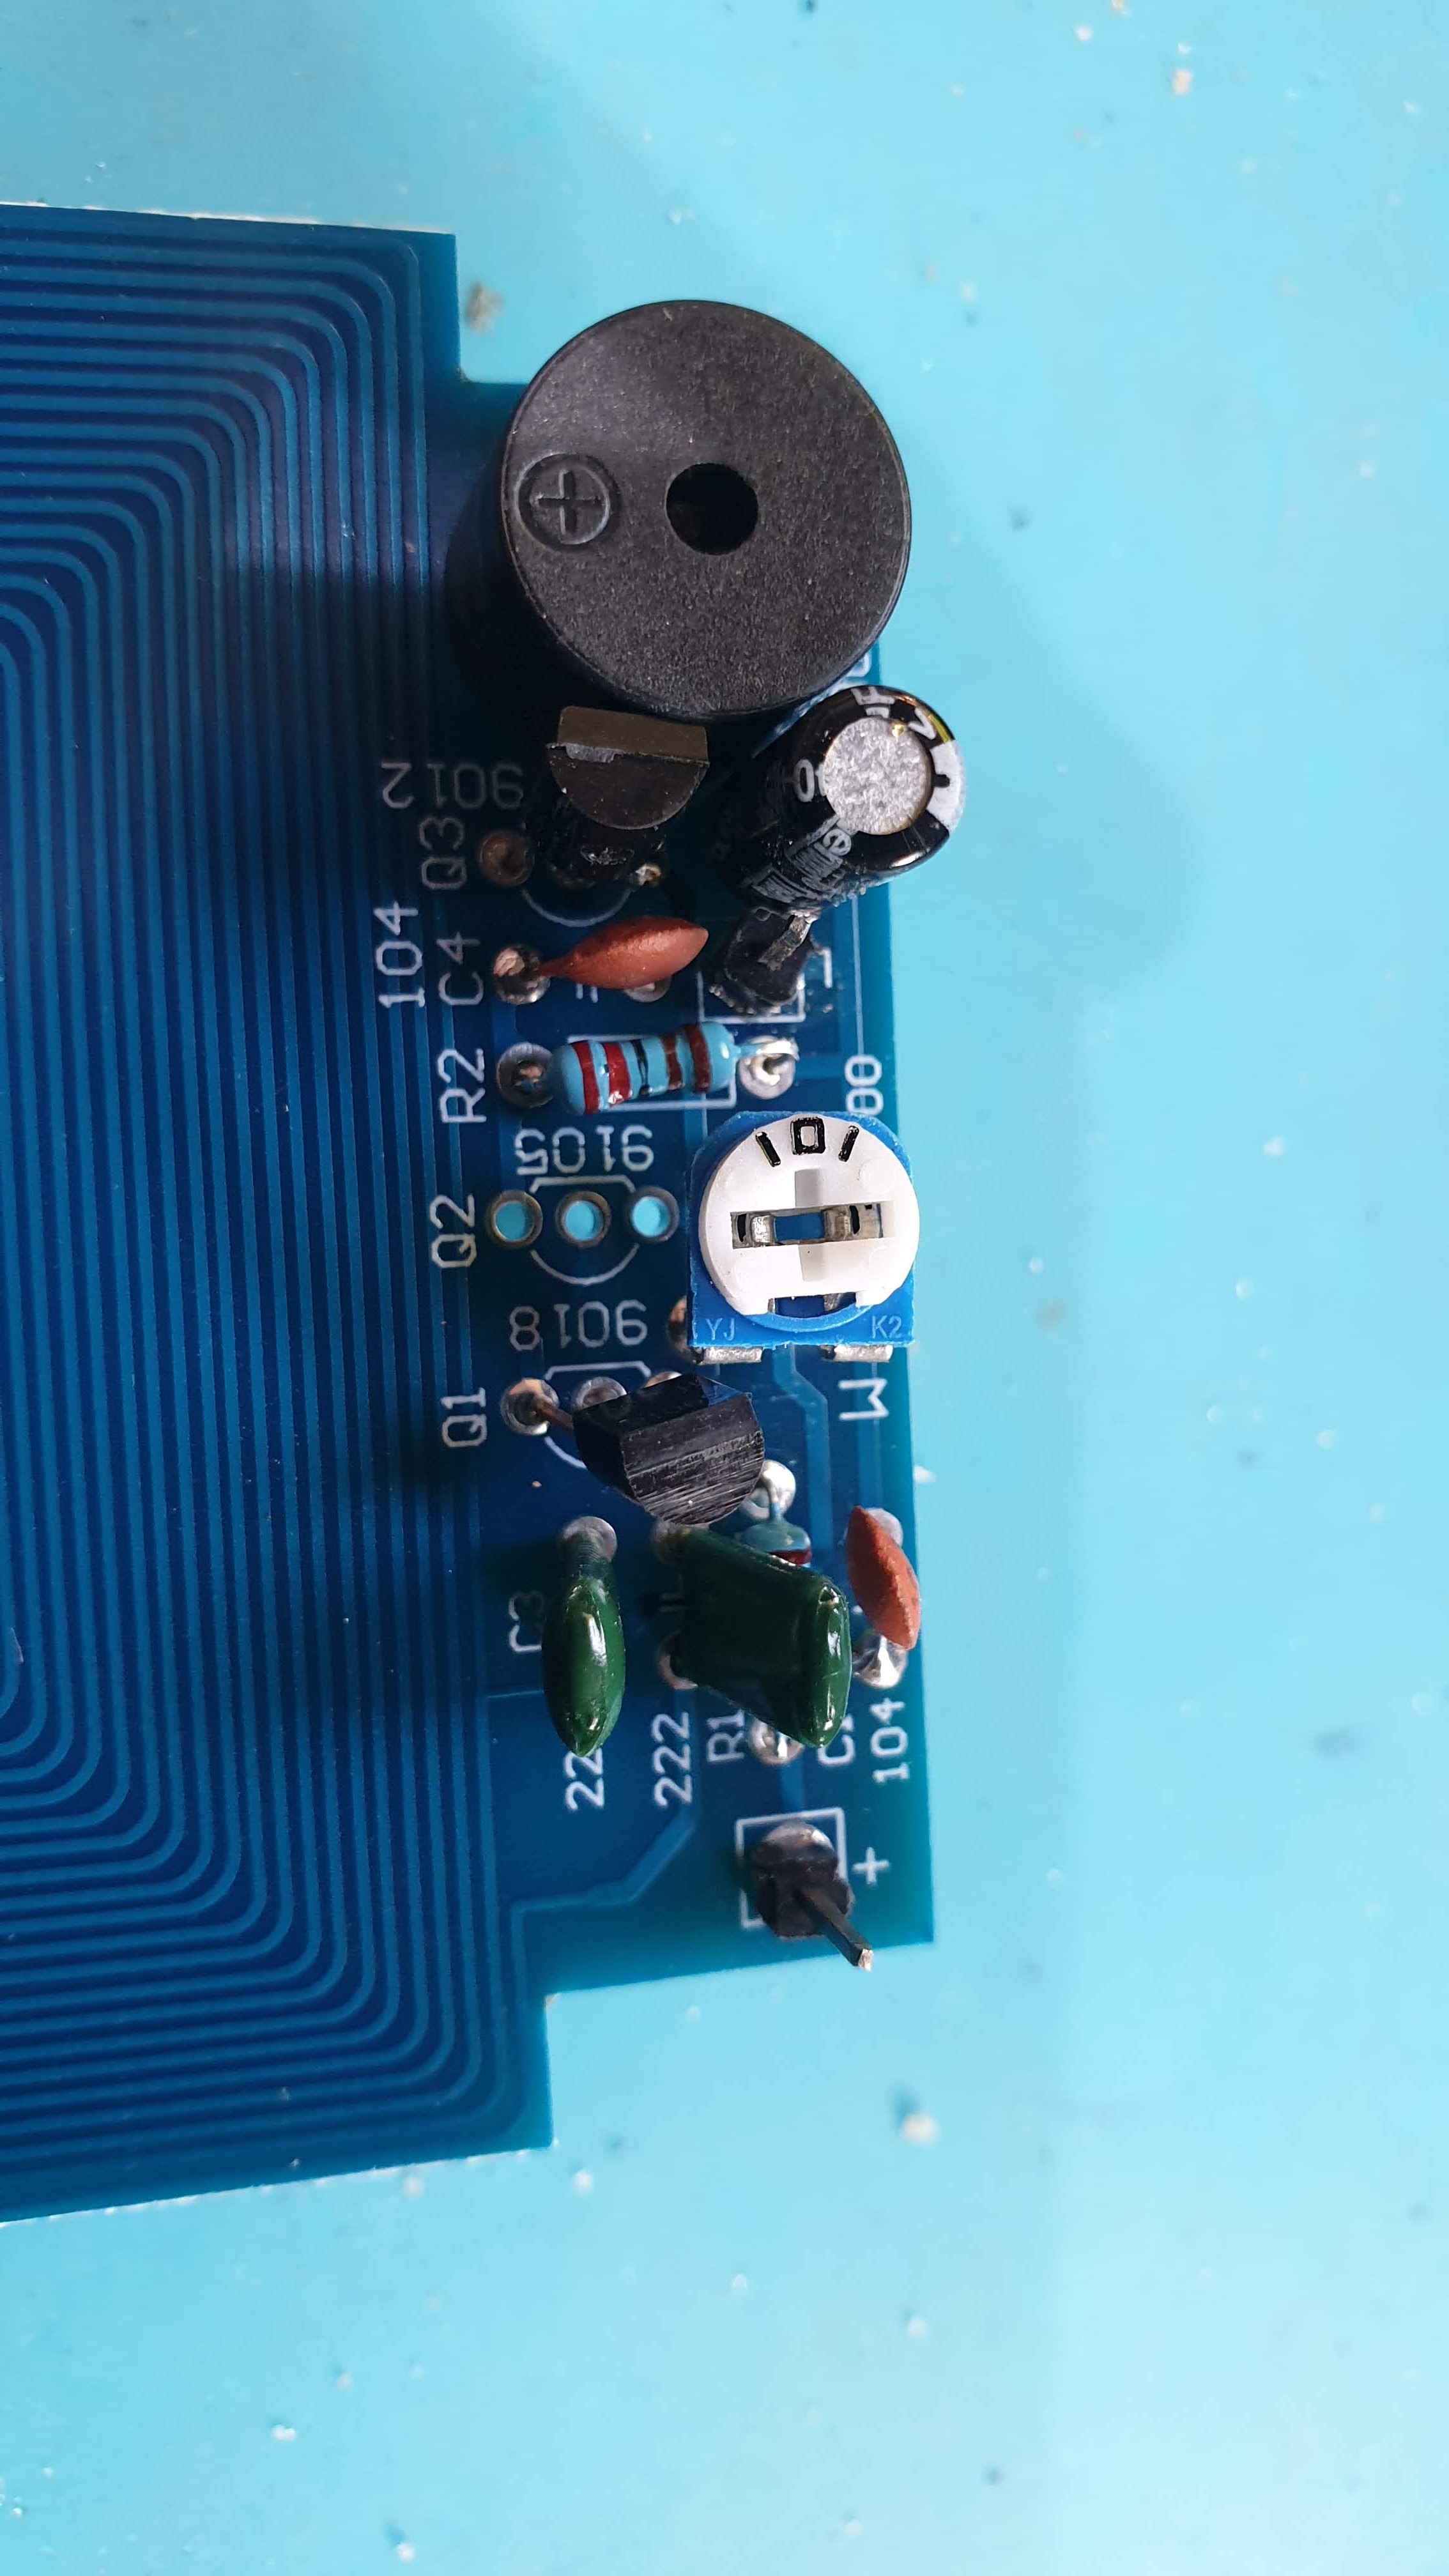
The kit contains more transistors than needed so after building an testing i now have some extra transistors. An instruction manual or schematic was not included. Information which components to place where was on the PCB


I included a photo of the front and back of the PCB.

After assembling i powered the metal detector using 3 1.5 AA batteries (= 4.5V). This metal detector seems to work better than the one in my Metal detector -1- blog post. This second metal detector only has a buzzer. not an led. See picture below. It only gives a signal when metal is near the PCB. (It is possible to create a (false) signal by moving the batteries and battery wires near the detection coil. The pot meter can be used to adjust the sensitivity.
I have found a circuit for a metal detector using a 555 timer and i have some of these 555 times i stock.
Perhaps, some time, i also build a metal detector using the 555. However i  am also working on other projects and received some PCBs and other components for these project. And for now i have a nice working metal detector so i want to give priority for these other projects. 


Sunday, October 4, 2020

Metal detector -1-

Recently i did buy this cheap DIY metal detector kit at Aliexpress.

Here some pictures of the parts ant the assembly. Soldering the components was not very difficult. As i wanted to use the power screw terminals in another project i soldered two Dupont pins instead for the power. In fact is was a three pin male Dupont pin where i removed the middle pin. The two outer pins where at exact the right distance on the PCB.


Below the circuit diagram for this metal detector found on the internet 


I did build and tested the device powering it with 3 1.5 volt batteries (=4.5V) on the Dupont pins. My device continuous gives a signal that changes a when near metal. Changing the pot meter gives a change in the sensibility.This metal detector continuous gives a sound. Don't know if this is due to an error or intentionally. I did not do much troubleshooting to see if it was due to an error made during building and if i could improve it as i don't like it.

This is part -1- of my post about a metal detectors as i also ordered another cheap metal detector and i want to compare them.

Monday, September 28, 2020

EEPROMshield

The PCB design of my EEPROM test/development shield is ready. 
Hope to post soon (after receiving the PCB), more details and test results of this Arduino shield on this blog.
This PCB is a breadboard friendly Arduino shield for multiple EEPROMs.  September 2020 the final design (using EasyEDA ) for the first version this board was ready. However i decided to wait for ordering  this PCB until i tested an EEPROMs. 

Sunday, August 30, 2020

Mailbag 29 augustus 2020

Below new mailbag items.
As they are often needed for small projects some switches. On the photo you can see the foam package for protection during the transport.

 
As for less than 5 euro's it is possible to buy a small weighing scale on AliExpress For long time i had this on my wish list and some weeks ago I decided to buy one (300g/0.01g.). Not only can it become quite handy for counting electronic parts, I also hope to find time for chemistry or physics experiments. I expect it is more easy to use than the old analytical balance i have. When i started doing chemistry experiments many years ago i did never dream i could buy this instruments below 5 euros. I hope to do a full review including testing with some weights. What i already can say, it is small and looks nice. The front already had some scratches (see photo) and i had some trouble opening the back for placing the two AAA batteries. The 0.01 gram display looks stable during weighing 
 
Below some gloves to protect my hands. I was very happy with some other gloves i used before. However after some time working in the garden holes started to appear and I could not find the same one so i decided to try this gloves from China / Aliexpress.   

Monday, August 17, 2020

EPROM eraser (UV)

Received an UV EPROM eraser from china so i can wipe the content some old classic memory chips that i still have so i can use them in future projects.  On the top right is the on/off switch. The 'rotating knob' on the top left is a mechanical timer to set the UV exposure time.
Here a picture where you can see the bottom. I don't know what is the original idea of the hole in the little drawer. When i switch the device on i can see some of the light inside this compartment where the EPROMS need to be placed.
The device came sooner than expected. I expected an EU power plug, however that is easy to fix. The 220Volt seems, according to the description no problem.
I don't have the electronic circuit ready to program and test the EPROM chips. Also there are some other activities and projects that have more priority. However at least now i have all the components to use EPROM memory. Perhaps i can even us it with some other UV experiments.
 

Thursday, August 13, 2020

Digital Testpen

 A week ago i received a cheap digital test-pen from china. I already mentioned in my mailbag post that i would post something about two small cheap upgrades. 

This cheap device can be used to test digital signals. it contains of a pcb with a wire as test pin and Dupont cables and comes in a sealed plastic bag. There exist several schematics to build these kind of devices yourself. However this was a cheap (almost) finished product on AliExpress.
I did two little cheap hacks to enjoy the use of this device even more. However first a photo of the back of the pcb to get a complete visual impression of the device.

As not all points always have Dupont connections i added male Dupont pins to small alligator clips. Using this alligator clips attached to the wires the testpen can also be used if no Dupont pins with power are available in the circuit you want to test. 
After soldering i even decided to remove the plastic of the male pin.
The second easy and cheap hack is using transparent heat shrink over the PCB to protect it. It can be done very easy and adds protection to the test pen pcb circuit. All you need to do is cut some transparent heat shrink tube at the appropriate size. Put it over the pcb and shrink it with a hot air gun.
If you want even more protection you can use a hot glue gun to first add a glue layer. For my use of this device i expect the heat shrink tube will be sufficient. 
Below you see the result: 


Wednesday, August 12, 2020

Mailbag_09aug2020

 Some days ago i received some interesting items from Aliexpress / China. Time for another mailbag blog post!

UV detection card


I did see this item in a YouTube video. It is a cheap card an can be used to detect UV light. I did not yet test it, however it seems useful to have for my experiments with UV leds and lamps and other experiments with optics, The mall picture show the backside of this card.

Digital test pen

On Aliexpress i found this cheap digital signal test-pen to test 5 and 3 volt digital signals.  I hope to post soon on my blog some hacks/little improvements.

Pen with conductive ink


In several articles and YouTube videos people experiments with electrical conductive ink are presented.
It looks that you can easy draw your electronic circuit on paper and glue with conductive glue your components. I found this conductive ink on Aliexpress and decided to give it a try.
I did not yet full tested the product. Perhaps i did buy a to cheap conductive ink pen as it was more difficult than expected. Before the ink started flowing i had to shake the pen and to move the pen over the paper several times. When shaping the pen you hear a little ball (?) moving in the ink reservoir.
After trying to write suddenly ink starts to come out of the pen. With my multi-meter i measured the resistance and it was not conductive. To get a conductive line i had to write the same line several times and dry the ink with my heater that i normally use for heat-shrink tube. (First I did not yet use it for real electronic experiments.

Lamp holder

This are cheap lamp holders for GU10 lamps. I ordered some as i want to replace some halogen lamps with GU10 led lamps. At the local hardware stores (Praxis or Gamma) i could not find lamp withe the same diameter as the current halogen lamps.

Temperature sensors

These three legged items perhaps look as transistor. However they are cheap smart temperature sensors (DS18B20 ) .Two wires are for the plus (+) and minus (-) and one wire is used for data transmission to a micro-controller.  Several of these sensors can be placed in parallel and the temperature of each sensor can be read individual as all sensor have an unique address.


Hand drill

This little tool is something i should have bought sooner. In the few days i have it now i used it several times. It has a little drill chuck for little drills. This way i can easy make little holes e.g. in plastic and do not need to use a fast rotating electrical dill or Dremel or punch a holes with other tools.


Tuesday, July 21, 2020

LCD

Received two LCD displays from China.
Plan is to use them with my FPGA('s).
Therefore soldered Dupont connector pins (See pictures below).
Expect that for playing with these displays and posting something about it will take more time than the soldering....

LCD 1602


LCD 12864